5-Star Italian Chicken Cutlets: Your Roadmap to Culinary Perfection
A Deeper Dive into Culinary Tradition
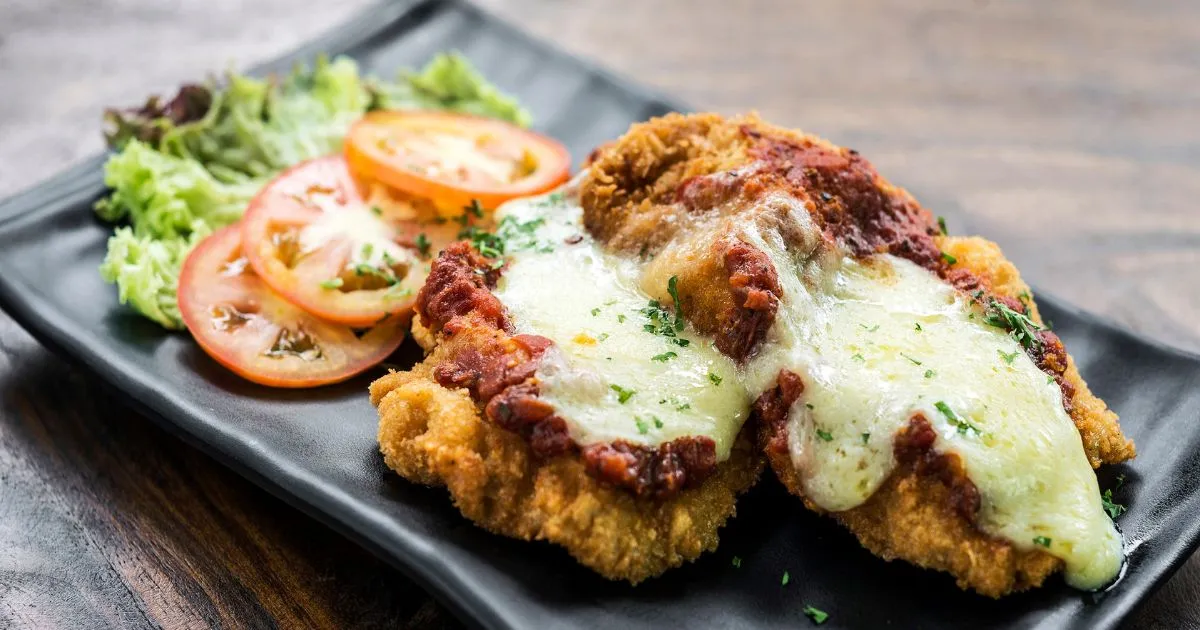
Italian chicken cutlets represent far more than a simple dish – they are a culinary narrative that spans generations, regions, and family traditions. This comprehensive guide will take you on an extraordinary journey through the world of Italian chicken cutlets, exploring every nuanced aspect of this beloved culinary treasure.
Table of Contents
Historical Roots: The Evolution of Italian Chicken Cutlets
Ancient Culinary Foundations
The story of Italian chicken cutlets is deeply rooted in Italy’s rich culinary history. Originating from the concept of “scaloppine” – thinly sliced meats prepared with precision and care – these cutlets evolved from a practical method of tenderizing and stretching meat to a beloved culinary art form.
Regional Variations
Different regions of Italy have developed unique approaches to preparing chicken cutlets:
– Northern Italy: More butter-based preparations
– Southern Italy: Olive oil-centric techniques
– Sicily: Incorporation of Mediterranean spices
– Tuscany: Emphasis on herb-infused breadings
Anatomy of the Perfect Italian Chicken Cutlet
Meat Selection: The Critical First Step
Chicken Breast Considerations
– Organic vs. Conventional
– Importance of muscle fiber direction
– Ideal thickness (1/4 inch optimal)
– Free-range vs. Standard chicken
Selecting the Best Cuts
Chicken Cut | Flavor Profile | Preferred Preparation
|———-|—————–|—————–|
| Boneless Chicken Breast | Lean, uniform | Classic cutlets |
| Chicken Thigh Meat | More flavor, slightly fattier | Rustic preparations |
| Organic Chicken | Enhanced flavor profile | Gourmet presentations |
Preparation Techniques
Pounding Methodology
1. Use plastic wrap to prevent contamination
2. Start from the center, work outwards
3. Maintain consistent 1/4-inch thickness
4. Use meat mallet or heavy skillet
5. Gentle, even strokes prevent tearing
Tenderizing Secrets
– Salt brining (30 minutes)
– Buttermilk marination
– Enzymatic tenderizers
– Mechanical tenderizing techniques
Breading: The Art and Science
Breading Components
Flour Layer
– Purpose of initial dredging
– Seasoning recommendations
– Gluten-free alternatives
Egg Wash Techniques
– Whole egg vs. egg white
– Adding liquids (milk, water)
– Seasoning egg wash
Breadcrumb Mastery
– Traditional Italian breadcrumbs
– Panko variations
– Homemade vs. store-bought
– Seasoning blend secrets
Advanced Breading Techniques
1. Three-stage breading process
2. Double breading method
3. Resting time between layers
4. Temperature considerations
Cooking Methods: Beyond Traditional Frying
Cooking Technique Comparison
| Method | Pros | Cons | Difficulty |
|——–|——|——|————|
| Pan Frying | Crispy exterior | High oil usage | Moderate |
| Oven Baking | Healthier option | Less crispy | Easy |
| Air Frying | Low oil, crispy | Limited capacity | Simple |
| Grilling | Smoky flavor | Potential dryness | Advanced |
Detailed Cooking Instructions
1. Pan Frying Perfection
Achieving pan-frying perfection is both an art and a science, especially when it comes to crafting the ultimate Italian chicken cutlets. The secret starts with oil temperature. Maintaining a consistent heat between 350-375°F is essential. Too low, and your coating absorbs oil, turning greasy. Too high, and the breadcrumbs burn before the chicken cutlets cook through. Use a thermometer for precision—it’s your best ally in the kitchen.
Choosing the right pan makes all the difference. Cast iron skillets offer unbeatable heat retention, giving you that golden, even crust. Stainless steel, on the other hand, excels at quick heat adjustments, which is perfect for preventing overcooking. Both work wonders, but it’s about preference and the texture you crave.
Then, there’s the oil. For authentic flavor, light olive oil is ideal, lending a subtle richness without overpowering. Need something neutral? Vegetable oil stands up beautifully to high heat and lets the cutlets’ flavors shine.
As the breaded cutlets sizzle in the pan, you’ll know you’re on your way to culinary greatness. With attention to these details, your Italian chicken cutlets will transform into crispy, tender perfection every time
2. Oven Baking Technique
When it comes to cooking Italian chicken cutlets, oven baking is a reliable method for achieving a crispy exterior and juicy interior without the extra oil from frying. The key lies in mastering a few essential elements: rack placement, preheating, and choosing between convection and conventional baking.
Rack placement is critical. For even cooking, place the baking rack in the center of the oven. This ensures that heat circulates evenly around the chicken cutlets, creating a perfectly golden crust. If you’re aiming for a slightly crispier texture, consider moving the rack one level higher toward the top for the final few minutes of baking.
Preheating isn’t optional—it’s a must. Set your oven to 400°F and allow it to fully reach this temperature before sliding in the pan. A properly preheated oven helps seal in the juices immediately, ensuring your Italian chicken cutlets remain tender on the inside while crisping beautifully on the outside.
As for convection versus conventional baking, both have their merits. Convection ovens, with their circulating hot air, can deliver a more evenly browned and crisp finish. Conventional ovens, however, provide a steady, radiant heat that’s perfect if you prefer a more traditional texture.
By fine-tuning these elements, your baked chicken cutlets will be a testament to precision and flavor. Simple, healthy, and utterly delicious!
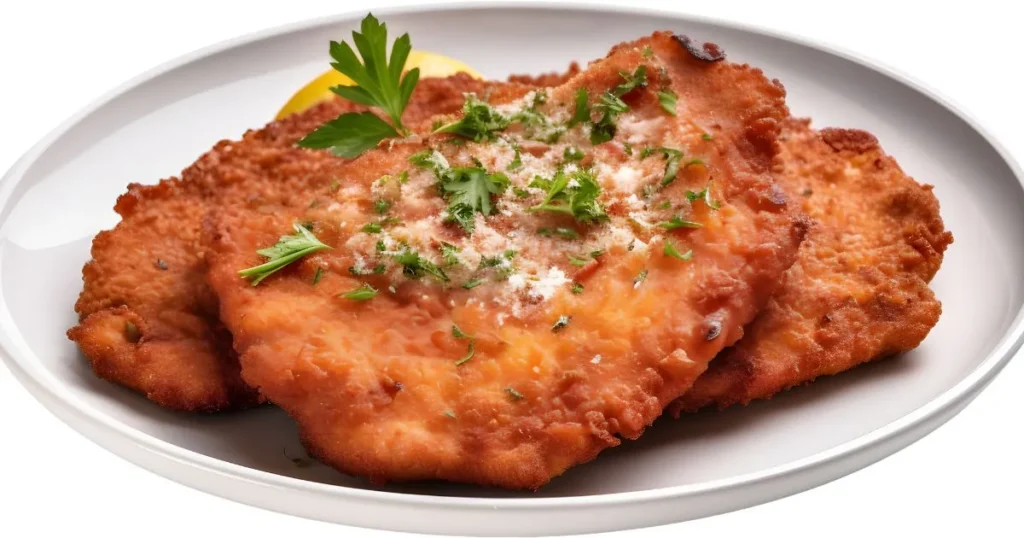
3. Air Fryer Method
The Air Fryer Method: Crispy Perfection with Ease
For crispy, golden Italian chicken cutlets without the extra oil, the air fryer is your best ally. This versatile kitchen gadget simplifies cooking while preserving flavor and texture. To get the best results, pay attention to temperature, basket arrangement, and moisture retention techniques.
Start with the right temperature settings. Preheat your air fryer to 375°F, ensuring it’s hot enough to crisp the breadcrumbs while locking in the juiciness of the chicken cutlets. Avoid going higher than 400°F, as this may cause uneven cooking or scorch the coating before the chicken is fully cooked.
Basket arrangement plays a critical role. Lay the chicken cutlets in a single layer, leaving enough space between each piece for proper air circulation. Overlapping or crowding the basket can lead to soggy, unevenly cooked cutlets. For an extra crisp finish, lightly mist the breading with cooking spray before cooking.
Moisture retention is where magic happens. To keep the chicken tender, marinate it beforehand or lightly coat it in olive oil. Additionally, flipping the cutlets halfway through cooking ensures they stay evenly juicy while achieving a uniform crust.
With these simple adjustments, your air-fried Italian chicken cutlets will be a healthy, flavorful masterpiece—crispy on the outside, tender on the inside, and irresistibly satisfying.
Flavor Profiles and Seasoning Strategies
Herb and Spice Combinations
– Classic Italian herb blend
– Regional spice variations
– Fresh vs. dried herbs
– Grinding and mixing techniques
Marinades and Flavor Enhancers
1. Lemon and herb marinade
2. Garlic and parmesan infusion
3. Mediterranean spice blend
4. Wine-based marinades
Nutritional Deep Dive
Macronutrient Analysis
| Nutrient | Amount | Daily Value % |
|———-|——–|—————|
| Protein | 30g | 60% |
| Carbohydrates | 15g | 5% |
| Fat | 12g | 18% |
| Calories | 280 | – |
Health Considerations
– Lean protein source
– Low-carbohydrate option
– Adaptable to dietary restrictions
– Micronutrient profile
Global Culinary Influences
International Variations
– American chicken parmesan
– Japanese chicken katsu
– Austrian Wiener Schnitzel
– Brazilian variations
Troubleshooting and Expert Tips
Common Challenges
1. Preventing soggy breading
2. Maintaining consistent thickness
3. Avoiding overcooking
4. Breading adhesion techniques
Professional Chef Secrets
1. Temperature Control
The key to golden, crispy cutlets is maintaining the right temperature throughout the cooking process:
Pan Temperature: Ensure the pan is hot but not smoking before adding the oil. A temperature of about 350°F (175°C) is ideal for frying.
Oil Heat: Use neutral oils like vegetable or canola oil, and keep the oil temperature consistent to avoid greasy or unevenly cooked cutlets. A cooking thermometer can help monitor this.
2. Resting Periods
After Breading: Once you coat the chicken with breadcrumbs, let the cutlets rest for about 10-15 minutes before frying. This allows the coating to adhere better, ensuring a crisp texture that won’t fall off during cooking.
After Frying: Let the cooked cutlets rest on a wire rack for a few minutes. This prevents sogginess by allowing excess oil to drain without trapping heat.
3. Layering Techniques
Proper layering elevates both the flavor and texture:
The Three-Step Dredge: Follow the classic dredging technique of flour, egg wash, and breadcrumbs. Use seasoned breadcrumbs (or panko for extra crunch) and consider mixing in grated Parmesan cheese for added flavor.
Don’t Skimp on Seasoning: Season each layer—chicken, flour, egg wash, and breadcrumbs—to ensure every bite is flavorful.
4. Equipment Recommendations
Heavy-Bottomed Skillet: A cast-iron skillet or stainless steel pan ensures even heat distribution for consistent cooking.
Wire Rack: After frying, place cutlets on a wire rack instead of paper towels to maintain crispiness.
Meat Mallet: Pound the chicken to an even thickness to promote uniform cooking and prevent overcooking.
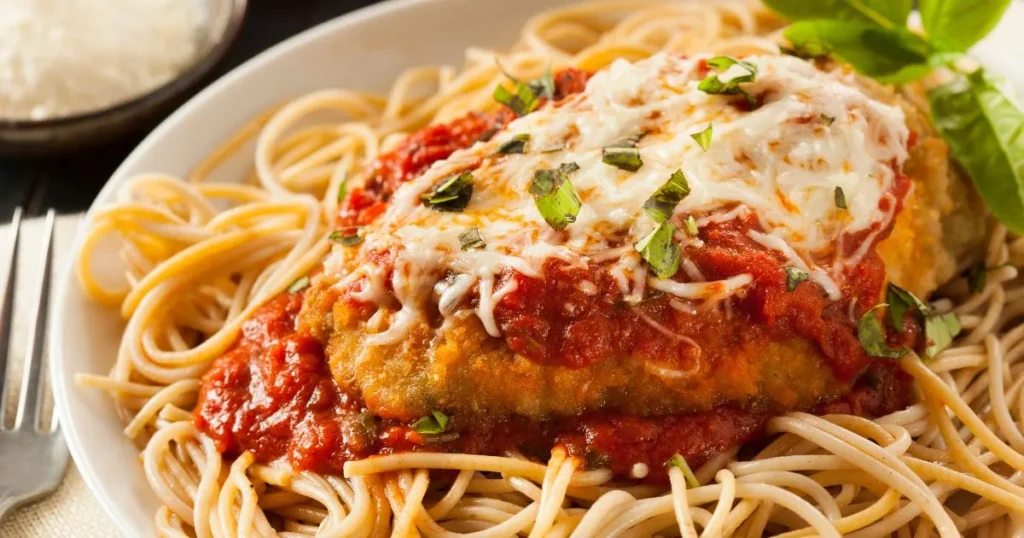
Serving and Presentation: Italian Chicken Cutlets
Italian chicken cutlets are versatile, delicious, and can shine as the centerpiece of a meal when served and presented thoughtfully. Below are ideas to inspire you with accompaniments, sauces, and garnishing techniques to create a well-rounded and visually appealing dish.
Accompaniment Recommendations
- Classic Pasta Pairings
Spaghetti Aglio e Olio: A simple olive oil, garlic, and red chili flake pasta complements the rich and crispy chicken cutlets.
Pasta Pomodoro: A light tomato-basil sauce pairs beautifully with the savory, breaded chicken.
Creamy Alfredo or Pesto Pasta: For a richer option, serve alongside creamy Alfredo fettuccine or vibrant pesto linguine.
- Salad Combinations
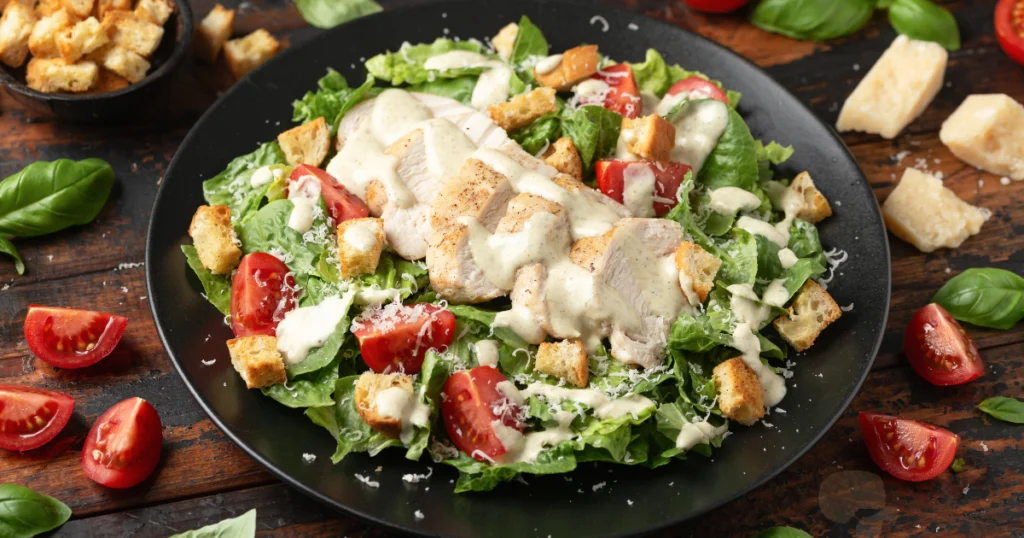
Arugula and Parmesan Salad: Toss arugula with shaved Parmesan, olive oil, and lemon juice for a fresh and zesty side.
Caprese Salad: Sliced tomatoes, fresh mozzarella, basil, olive oil, and balsamic glaze add a touch of Italian tradition to your plate.
Mixed Greens with Balsamic Vinaigrette: A light salad balances the richness of the cutlets. Sprinkle in some nuts or dried cranberries to add depth and interest.
- Sauce Selections
Marinara Sauce: Serve it on the side for dipping or spooned lightly over the chicken for a classic presentation.
Lemon Butter Sauce: A drizzle of lemon butter enhances the crispy texture while adding a bright, tangy flavor.
Aioli or Garlic Cream Sauce: Perfect for dipping and adding indulgence to your dish.
- Garnishing Techniques
Fresh Herbs: Sprinkle chopped parsley, basil, or thyme for a touch of freshness and vibrant color.
Grated Parmesan: Add a generous dusting of grated Parmesan cheese for a traditional Italian touch.
Lemon Wedges: Serve with lemon wedges to let diners squeeze fresh juice over the cutlets, enhancing the flavors.
Microgreens: A small handful of microgreens can make the plate look sophisticated and add a fresh, earthy flavor.
Presentation Tips
- Use white plates to make the golden brown chicken cutlets and colorful accompaniments pop.
- Arrange the cutlets slightly overlapping with a dollop of sauce beside or underneath for a modern look.
- Serve pasta or salad in a small ramekin or as a neat portion on the side to keep the plate balanced.
- Add a drizzle of olive oil or balsamic glaze on the plate edges for a gourmet touch.
With these serving, pairing, and garnishing ideas, your Italian chicken cutlets will not only taste incredible but also look restaurant-worthy!
Frequently Asked Questions
Comprehensive FAQ Section
Q: Can Italian chicken cutlets be made ahead of time?
A: Yes, prepare and refrigerate up to 24 hours. Reheat in oven to maintain crispiness.
Q: Are there vegetarian alternatives?
A: Consider eggplant or portobello mushroom cutlets using similar techniques.
Q: How to store leftover cutlets?
A: Refrigerate in airtight container. Consume within 3-4 days.
Conclusion: More Than Just a Recipe
Italian chicken cutlets transcend mere sustenance – they represent a culinary philosophy celebrating simplicity, tradition, and flavor. By mastering these techniques, you’re not just cooking; you’re preserving a rich gastronomic heritage.
Embrace your inner chef, gather your ingredients, and embark on a delicious journey through the world of Italian chicken cutlets. Your kitchen awaits its transformation into a Mediterranean culinary studio!

